| A few months ago I had to disembowel my pin cushion in search of lost needles and thus found myself without one. I found these cute owls on pinterest and decided they would make a great replacement. I have however, learned that I always plan on making these cute things for myself and by the time I have finished the ones for other people I have no desire to make one for me. So this weekend I am going to FINALLY make one of these cuties for myself! These owls were (I think) originally created on EfemeraInk and while I used her process I modified the patterns quite a bit. I'll post a few process pictures and steps from the new one I make later this week. For now, enjoy the cuteness! |  |
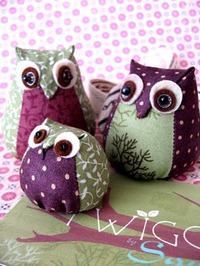 Here are the inspiration ones from EfemeraInk. | 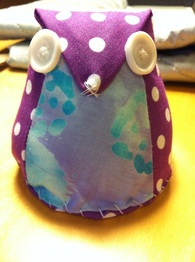 This one I made for Sammi and she uses it as a pincushion. | 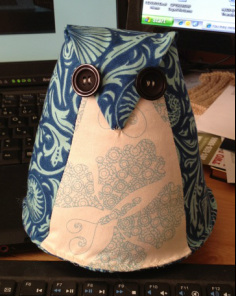 This is Whoo my Mom's Owl. :-) |
Image Tutorial
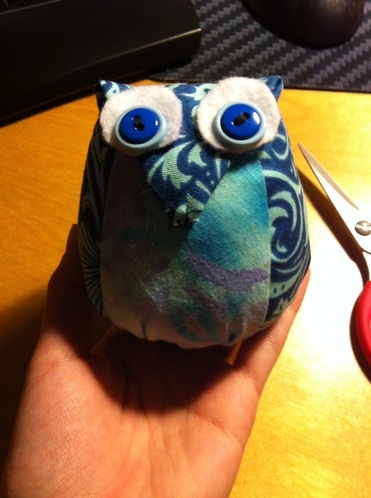
| You will need: Two different fabrics, two button, Felt for the eyes (optional), matching thread, cardboard and a protractor. Step 1: Decide on the measurements you'd like to have for your owl's size* and create the paper templates and cut the cardboard circle. Also, iron your fabric if necessary. *Length will make him taller, degrees will make him chubbier. Step 2: Trace and cut your fabric pieces out and sew up the sides of the triangles, right-side in. Step 3: Loosely stitch around the outside of the circle fabric, and the base of the large piece. Step 4: Right-side out the fabric and slip a pin across where you want the beak to fold over at and stuff the little cutie pulling the base thread tight when finished and tying it off to stay closed. Step 5: Using as clean of stitching as possible stitch down the beak and tie and cut the thread to stuff under the fold. Remove the pins. Step 6: Now for the tricky part... Thread a need and hand stitch the bottom on** as best you can. Step 7: Cutting a few circles in felt and using buttons (or beads) add in the eyes. **If you look carefully, all three owls I have sewn have different bottoms. Do the best you can and experiment. | 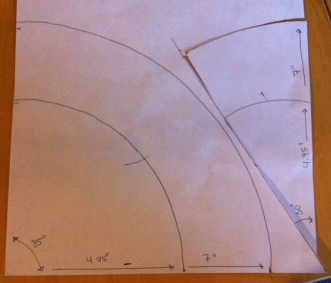  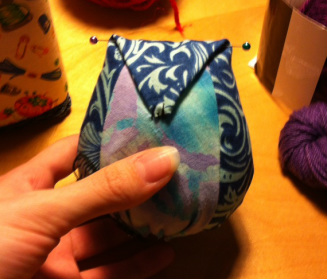 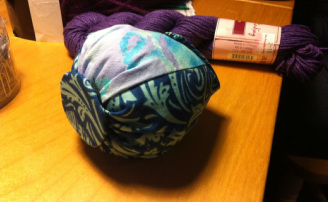 |
 RSS Feed
